Handcrafts on a military theme - step by step schemes for work for kindergarten and school children from different materials
Joint production of creative works with the baby will require you to arrange a comfortable space. You can sit comfortably even on the floor.

It is important to provide sufficient lighting, as well as safety rules - scissors with rounded edges, glue, awl and other materials used are stored in a separate drawer. Be sure to put on the workplace of the oilcloth or newspapers.

Materials for military crafts
Materials for military crafts, as well as for creativity with a child in general, choose eco-friendly, most often in the work use:
- wood, colored paper, plastic parts or parts of bottles, foam rubber, cardboard, pieces of fabric, tape, paint and glue;
- Various additions in the form of moving eyes, ribbons, shells, cones, and other various natural materials;
- For decorations and cards, beads and rhinestones are used;

Military equipment
Military equipment is more interesting to boys. But even girls will want to make a gift, and her version of a postcard for military dates can be especially touching.


Plasticine tank
Claymation tank - a great excuse for the boy to do creative work and at the same time create a new, exclusive toy.

All the more so, as no special expenses are required:
- a box of plasticine;
- a sheet of hard cardboard;
- a box of the most ordinary matches;

We start assembling our tank:
- Knead the plasticine thoroughly;
- Make a rectangle or a trapezoid out of it;
- You can place cardboard inside the figure - so you will not only save plasticine and time, but also facilitate the model as a whole;
- roll a couple of plasticine ribbons and make them around the hull of our future tank - on the left and on the right;
- make a circle out of plasticine so that later when mounted on the hull it would look like a turret;
- coat the match with plasticine and attach it to the turret - that is how we get the muzzle of the tank;
- from the edging made earlier, we mold the tracks and give them a more similar shape;
- from black plasticine insert circles into the caterpillars - the wheels;
- add details - a hatch, inscriptions, a flag or a red star;

Be sure that in the process of molding tell something of the history of the creation of this tank or an interesting episode from the chronicles of war with the technique.

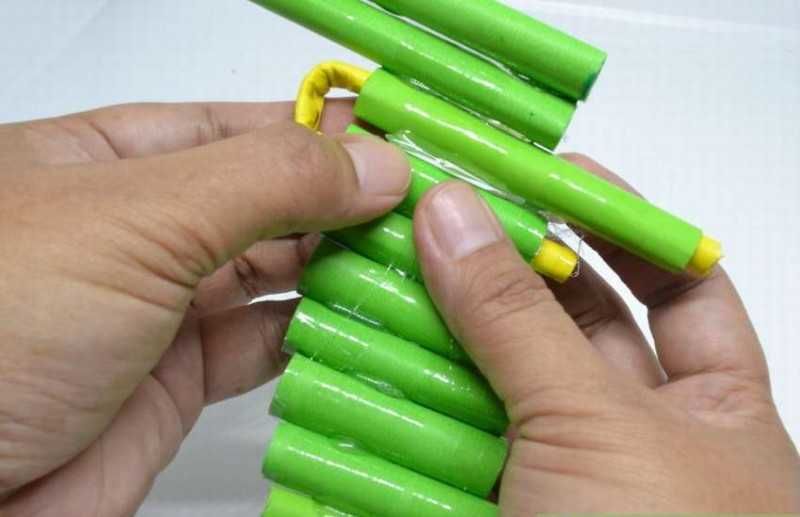
Paper tank
A paper tank is an easy and entertaining craft, you can interest a tomboy and captivate the boy - restless for a while. Prepare:
- colored paper;
- used boxes from the matches;
- safety scissors with rounded ends;
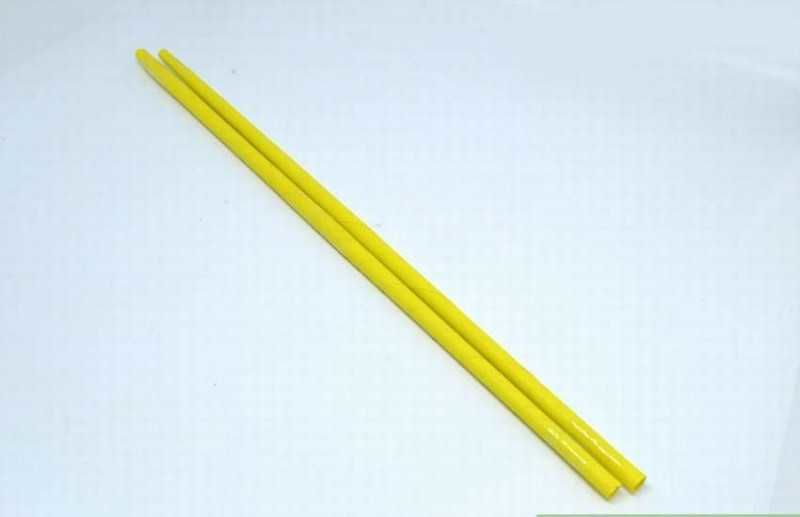
- cocktail straw;

Step-by-step tips for making a tank out of paper:
- create the body of the tank - glue the matchboxes with green paper;
- Cut out the caterpillars from paper - they can look like a long oval and must match the size of the body;
- glue black circles - wheels - inside the caterpillars;
- Make sure that the tracks look the same on both sides;
- from a cocktail straw we make the muzzle of the tank;
Be sure as the final step to add inscriptions, a flag or a red star.

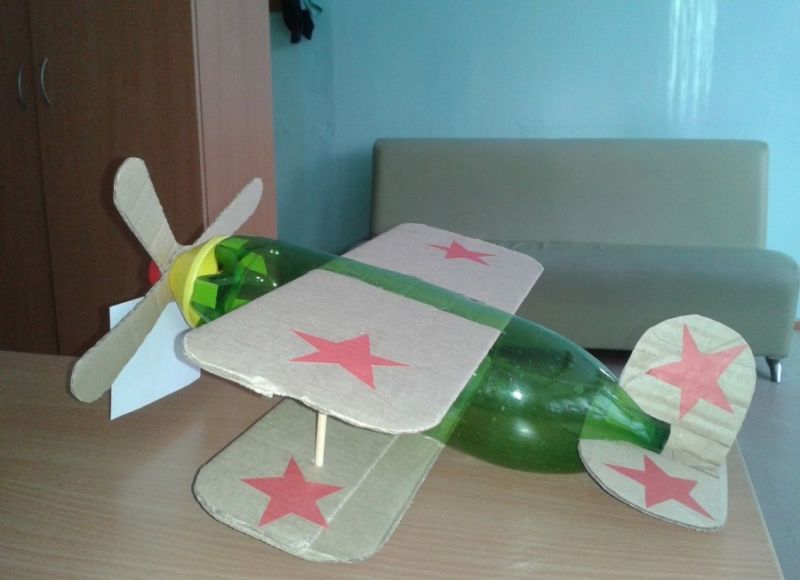
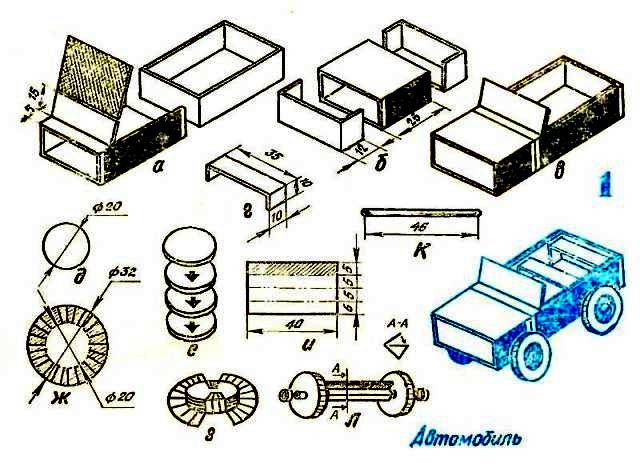
Aircraft from cardboard
Airplane made of cardboard - for an elementary school child will be very interesting this way of doing crafts. It will resemble gluing finished toy segments into one whole.
As an example, we will take the model of a "corncob. In addition to cardboard and glue, we need a matchbox:
- We cut from colored cardboard a strip with the dimensions of 21cm. long and 2cm. wide;
- From white cardboard we make strips with the size of 17 cm. long and 4 cm. wide - from these strips round the corners;
- exactly in the center of the big color strip from cardboard we glue the matchbox;
- smear the top and bottom of the matchbox with glue and glue the white cardboard strips as wings;
- cut out the four-bladed propeller and tail and glue them to the airplane;
- glue the landing gear, which will look like two black circles;
- Depending on the design, add stars or decorative elements;
Our airplane is ready.

Plasticine airplane
A plasticine airplane is one of the simplest, but fun crafts. Our airplane will not only be able to fly, but also to look at you eye-to-eye.

For such a fun airplane we will need:
- Plasticine - you can use blue and some yellow;
- ready-made moving eyes, they are often sold in crafts stores;
Let's start by kneading the blue clay with our hands:
- start making the body of our airplane from it - you can roll an oval shape, but one end should be much wider than the other;
- The wide part of the oval will be the front part of the plane, and the narrow part will be the tail part;
- now make two equal balls of blue plasticine - from these we make the wings of the plane, they will look like triangles;
- fasten the body and wings together;
- make a tail - make a blue triangle, smaller than the wings;
- make two small yellow symmetrical triangles and attach them to the sides of the tail triangle;
- attach the tail part firmly to the body;
- now, from the yellow plasticine, carefully mold the windshield;
- roll out the yellow plasticine flagella, and make a rim around the edges of the wings as a decoration;
- put the eyes on the windshield, and cut out the mouth - a smile;
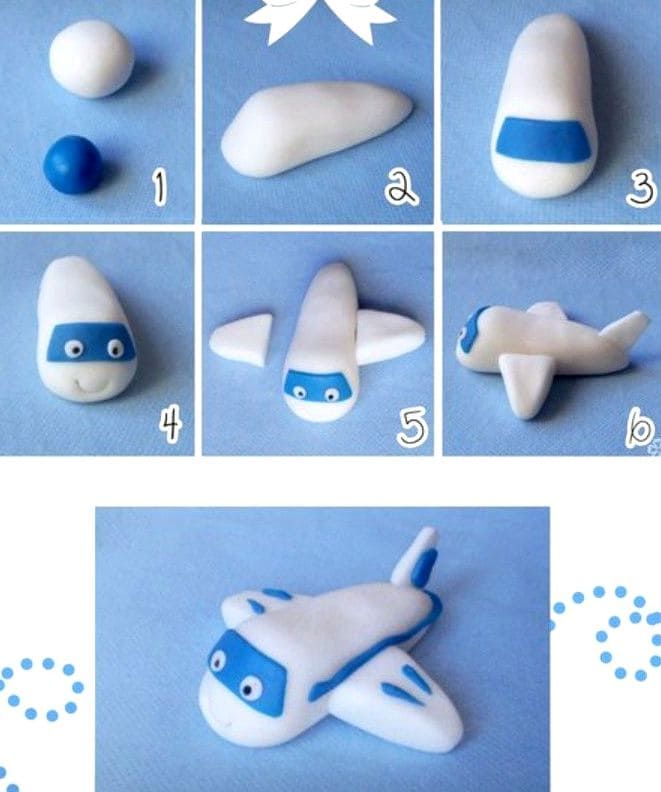
Our plasticine airplane is ready to fly and give a good mood.

Warship of colored paper
A warship made of colored paper - this handicraft on a nautical theme will be a nice gift. Our brightly colored warship will look quite presentable. Moreover, thanks to the support it will always find a place on a table or shelf.

To make a ship, we need:
- a set of colored paper and a sheet of blue cardboard;
- pencils, safety scissors and glue;
- double-sided adhesive tape and a stick to make a mast;
- Preferably decor elements - rhinestones, figurines of birds and small seashells;

For the base we take any template of the ship, in our case it is a military one. Such a base is easy to draw with an adult or download ready-made on a thick sheet of A4:
- We cut out the deck and glue to it the windows - portholes;
- to the end of the wooden stick we wrap the double-sided tape;
- place the mast in the center on the back side of the boat;
- Using yellow paper, make a flag by cutting a double piece by bending in the center;
- glue the flag to the stem of the ship;
- use double-sided tape to fix the thread;
- cut double colored flags in the shape of a triangle;
- glue the flags to the thread;
- begin to make a stand - fold a sheet of A4 cardboard in half;
- fold the first half in half;
- fold the second half 4 cm further;
- the formed bottom wide strip bend again in the opposite side;
- the line of fold should coincide with the fold on the first half of the cardboard;
- make blue strips about 1 cm thick, these will be the volumetric waves;
- On the front side of the stand we cut a wavy slit;
- The length of the slit shall be about 1 cm. more than the bottom of the deck;
- decorate the stand with rhinestones, stars, figures of birds or seashells;
- In the slot we put our ship, adding military attributes and inscriptions to it;

The various small parts can be thought out before you start making the ship by taking the necessary parts from the thematic ready-made kits.

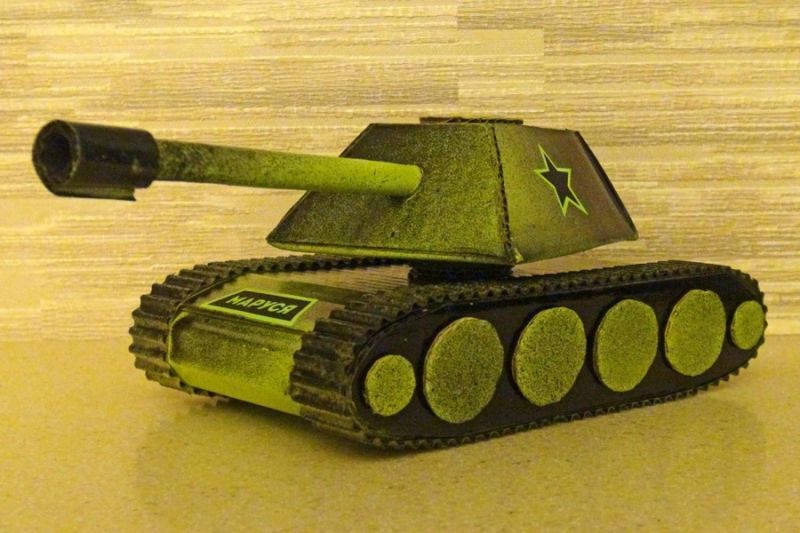
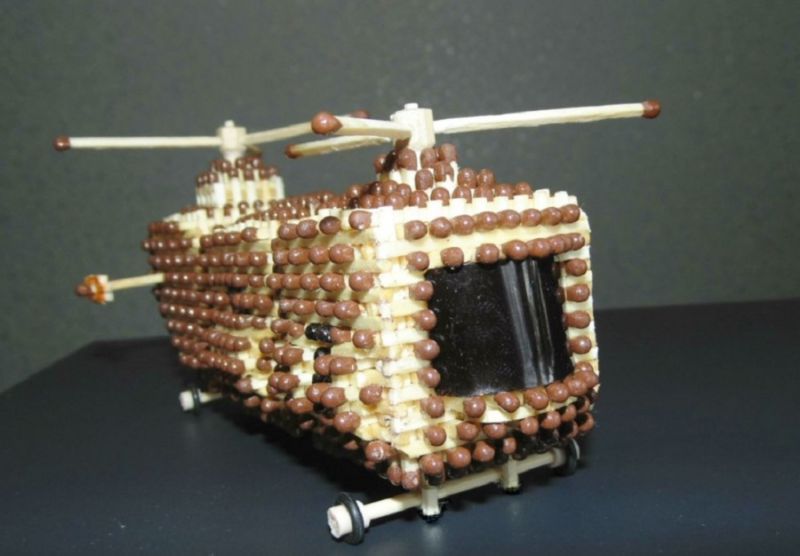
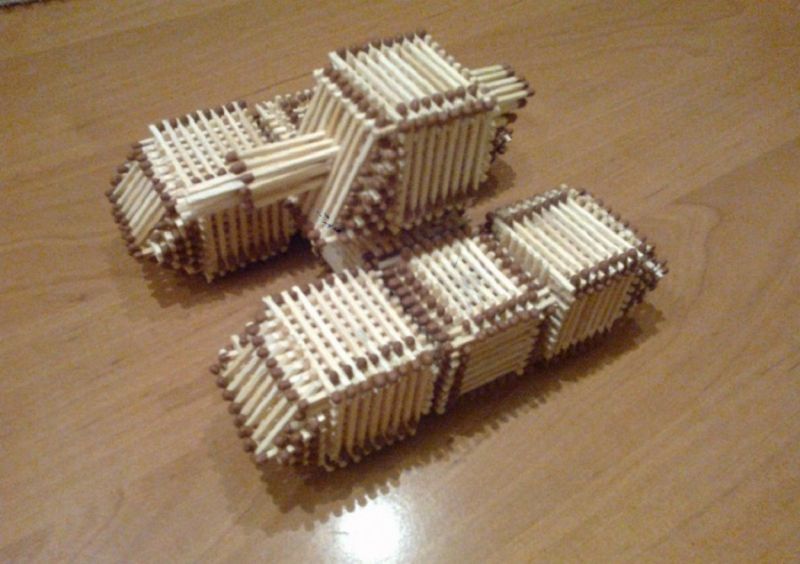
Matchbox war machine
A war machine made of matchboxes is not complicated, but a fascinating craft with interesting results. Later it can be used as an ordinary toy.

We will need:
- several empty matchboxes;
- cardboard and colored paper;
- glue and safety scissors;
- paints;
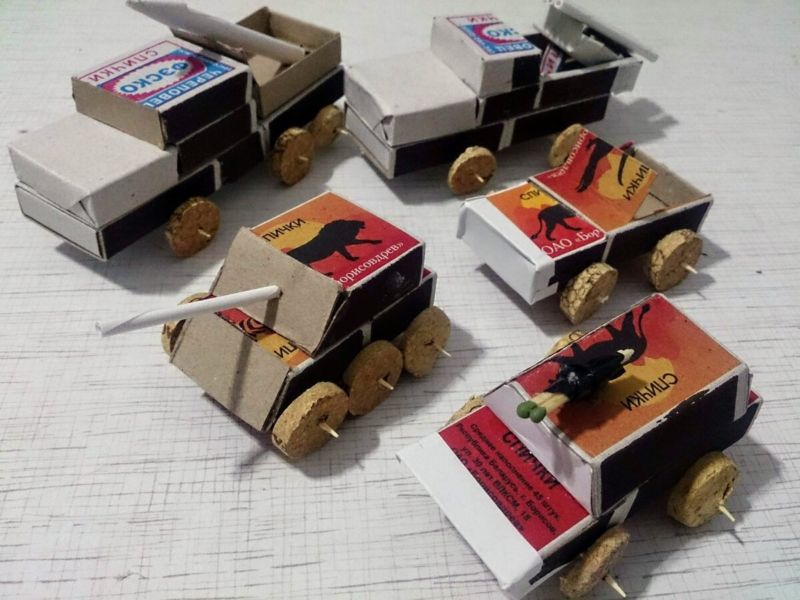
Start assembling our war machine:
- take the boxes out of the box;
- make side notches on the box;
- bend upwards at a slight angle;
- cut off unnecessary parts and put the box back into the box;
- at this point we should be able to see the contours of the car cabin;
- take the second box and cut its lid into two equal parts;
- we cut the removed box in the same way;
- Both parts of the cut drawer are placed in the half of the box on both sides;
- We glue the created construction to the cabin;
- From the remaining half of the box we cut out a couple of benches;
- fix the benches in the body with glue;
- Cut out four circles from heavy cardboard, they will serve as wheels;
- For beauty, paste the car with colored paper in dark colors or paint it in the military style;
- Add various military insignia;
This handicraft can be complicated by making the car movable running gear, we limited ourselves to hard glued wheels.

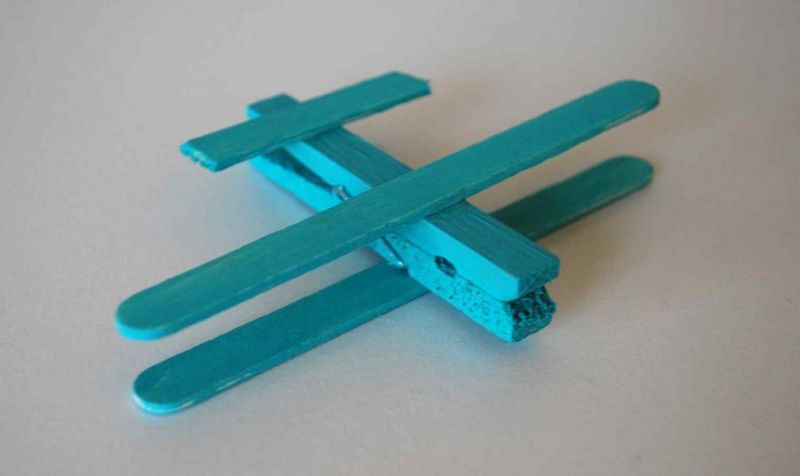
Airplane from clothespins and popsicle sticks
Airplane from clothespins and popsicle sticks - perhaps our airplane, made from these unpretentious improvised parts and will not fly on its own, but as a gift to a friend will be simply invaluable. Let's start with the preparation:
- The usual wooden clothespin, but if you have a choice - take as long as possible;
- glue - preferably PVA;
- an ice cream stick, it has to be flat;
- safety scissors;
- cardboard, including colored cardboard;
- toothpick;
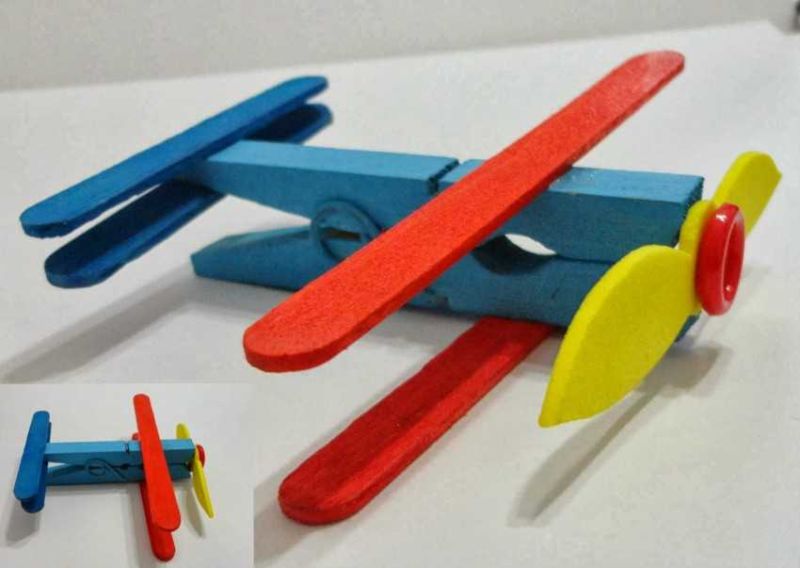
Assemble our airplane:
- clamp an ice-cream stick in the center with a clothespin - we have the contours of the fuselage and wings;
- cut out a propeller with four blades from cardboard;
- put the cardboard propeller on a toothpick;
- cut out the tail of the airplane from cardboard and glue it to the hull;
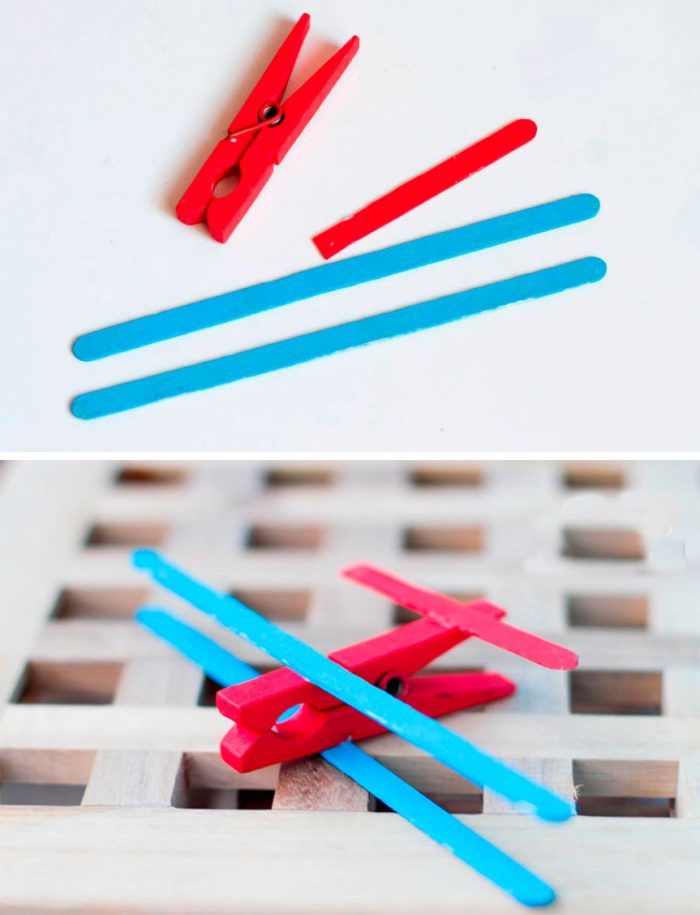
After assembling the simple model, you can paint it completely. Most likely you will need to do two or three coats of paint, that would not leave stains and the craft had a bright color.
Step by step master classes on the military theme
Such crafts are very important not only in terms of aesthetic and artistic learning child. But it is also a great opportunity to tell your child the history of military equipment.

In most military crafts are interesting to the boys, but girls are also happy to make such a gift for a brother, a father or a grandfather.


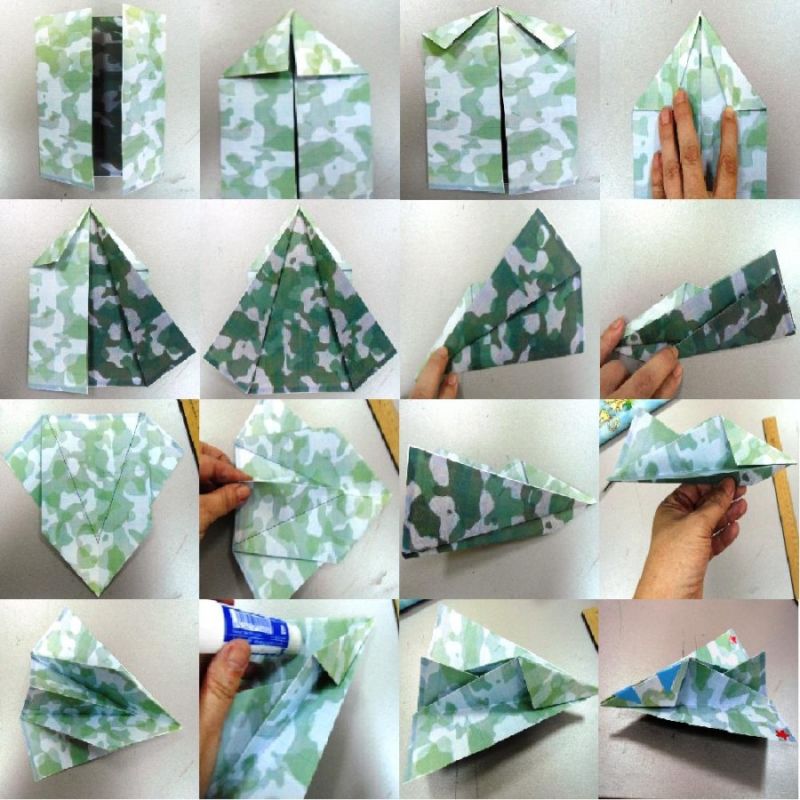
Soldier in origami technique
Soldier in the art of origami - probably only diligent girls can carefully and painstakingly make crafts in a fairly complex origami technique.

We offer the easiest version, for this we will need blanks:
- A sheet of colored paper of green color, square shape 20x20cm - to make the form;
- A small piece of black paper with dimensions 9x9cm - we will make soldier's boots from them;
- a green piece of paper with a square shape 5x5cm for a pilot's cap;
- a white paper triangle half the size of the previous green square, from which we will make a soldier's face;
- Glue and a set of pens with colored rods, you can markers;

Begin the process of modeling the figure:
- Fold in half a large green square;
- Unfold the square, and now bend both sides, located parallel to the place of the fold;
- connect them in the center;
- Unfold this sheet with its back side facing you;
- Do not unbend the folded sides, but perform a second bend;
- Wrap two sides of the resulting triangle parallel to the fold;
- Close them in the center;
- Rotate back on itself by the other side;
- Open the closed side obliquely;
- Perform two symmetrical bends, while unscrewing the corners toward you;
- Rotate the workpiece vertically, turned corners to themselves;
- Bend the workpiece slightly above the middle - you should be able to see the contours of the uniform and pants;
- Take the black sheet and unfold it to make a double triangle;
- and fold both sides inward;
- The top layer, in the form of two black sharp corners, lift up symmetrically;
- Spread out so that you get the cuffs of soldiers' boots;
- Connect the green cuffs and black boots with glue;
- glue the remaining white triangle on the second, smaller, green square;
- bend so that the green square turns into a pilot's cap, and the white one, by bending the corners, turns into a face;
- Draw a face on the white part of the head;
- glue an ice cream stick on the back for strength;

Important detail - the handicraft must be performed from double-sided colored paper.

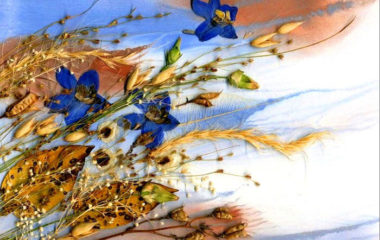
Postcard for May 9
Postcard for May 9 - the kids should be offered a simple, but storybook postcards in the form of paper crafts.

To perform this task, we will need not only materials, but also templates, so help your baby to prepare in advance:
- templates of a star, a St. George's ribbon and cherry or apple blossoms, you can also use a cut out template of a red carnation;
- a sheet of white or gray-yellow paper - the color can be styled yellow, it is worth giving it a light crumpling;
- pencils, safety paper scissors, a school ruler, and glue;

The templates can be cut out in advance, and the child will color it himself.
- tell your child why the letter was folded in a triangle;
- draw a greeting for May 9 on the sheet, let there be wishes for peace and health;
- design and color the card;
- fold the card into a triangle, the greeting inscription should be inside;
- Now glue the blanks - flowers, a St. George ribbon, or a star - on the outside of our triangle card;


Performance of this task - a good excuse to tell about the participants of the Great Patriotic War, which were in your family.

The soldier from a sleeve
Soldier from a sleeve - you can make a whole army of these soldiers, it will be quick and fun. They can be personalized by adding different accessories to each character. This soldier can be taken as a basis.

To make it we will need:
- a sleeve from toilet paper;
- a sheet of cardboard, colored paper, pencils, paint and a brush;
- Scissors, glue, twine, and half of an egg mold;

We will need to make some blanks first, here we go:
- On a piece of cardboard, draw a rifle, hands, and a circle, which should be larger than the shape of the egg;
- We paint these parts and give time to dry;
- We paint the sleeve green - this is the soldier's clothes, when dry we give it a camouflage look - you can cut and glue yellow and black spots of colored paper. Do not forget to leave space for the face.
- glue arms to torso;
- connect the rifle to the string and attach it to the body;
- make a helmet from the shell and glue it to the soldier's head;
- the eyes can be appliquéd, drawn or bought moving;
- Finally, we draw a mouth, nose, and eyebrows;

Our cute soldier from the sleeve is quite stable and can take its place on the table or on a shelf.

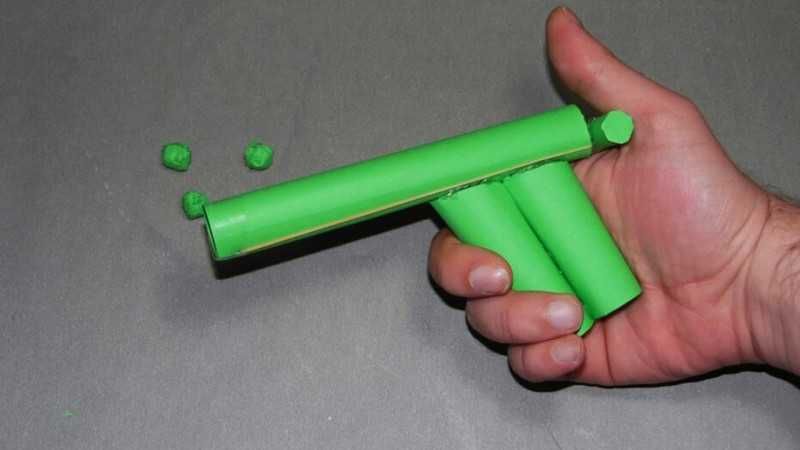
Paper pistol
Paper pistol - this item can be an independent toy as well as part of a finished theatrical stage image or costume for the New Year.

Preparation is needed here, as we will begin creating the gun by printing out a ready-made template on the printer.

Next we will need:
- several sheets of A4 paper and heavy cardboard;
- glue, a ruler and a simple pencil;
- Acrylic paint, preferably black;

We create our paper gun:
- cut out four identical templates;
- Remove the central part of two parts - this will be the location of the trigger;
- glue the components together;
- to cover the side cuts, cover our model with pieces of paper, you can wrap it with scotch tape;
- paint it and wait until it dries completely;
- glue the printed gun templates on;
- if the template is not bright, then paint it;
- make the trigger in a rectangular shape;
- On the top side make a small cut - it will cling to the rubber band;


Children are often unpredictable. They can appreciate a thing in which they have invested their effort, time and imagination is much higher than a purchased toy, regardless of its cost. By making any crafts together, you are not only teaching your child different skills, but you are in emotional contact with him.
Photo ideas of children's military crafts